– How it works
EUDI Wallets
with eIDAS 2.0


Why you need an EUDI Wallet
EUDI Wallets allow you to take your personal information with you, wherever you are. Good EUDI Wallet solutions allow you to:
How to make your identity safe?
After onboarding we need to make sure your identity is safe, and you and only you is able to access this.
The best way to do this:
The only catch is, is that now every time you want to use your identity, you need this hardware element. So you have to take it with you at all times, and do not lose it. That is why we invented the Remote Secure Element.
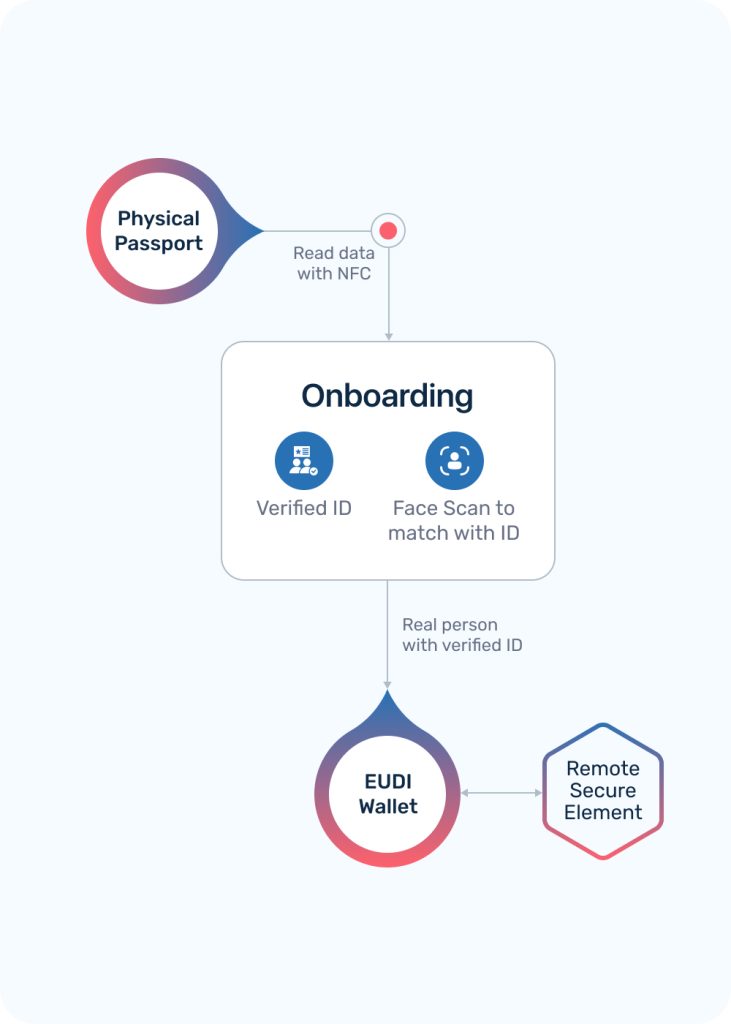
EUDI Wallet Secure Cryptographic Device

How to enjoy the high security of a hardware element, without the hassle of carrying it with you at all times?
Ubiqu solved this by inventing our patented Remote Secure Element (RSE). We allow users to store their hardware element in a secure data center. With a safe, encrypted, connection to their phones, they can now access it at all times, with just a PIN Code. This results in high user adoption and makes identity fraud something from the past.
Now we have a secure, portable EUDI wallet, it is time to use it!
How to use your EUDI Wallet
— Step 1
EUDI Wallet
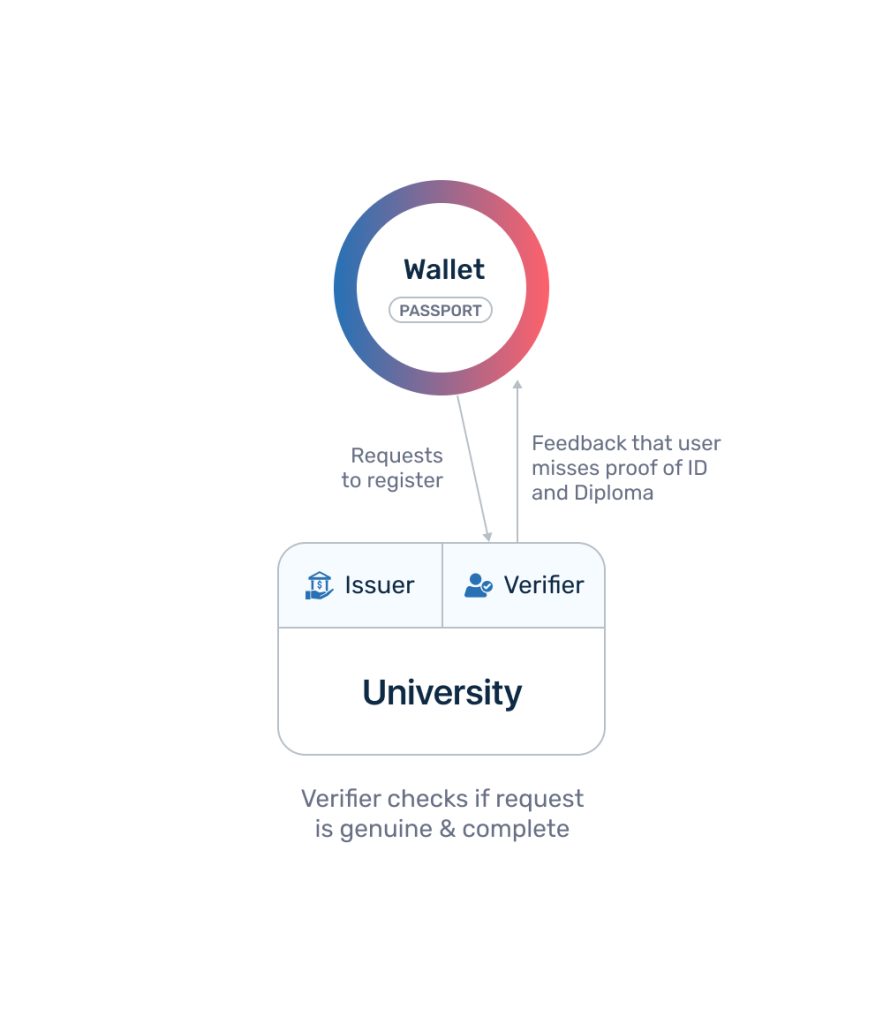
With your wallet you can collect, store and show a proof of your personal information. Let’s start with a simple example: You want to register at an University.
- You login with your EUDI wallet and to check the requirements.
- The verifier of the university (QAEE) checks the legitimacy of your wallet and the contents
- The verifier gives feedback that you miss a Personal ID and a proof of your high school diploma, required to register.
— Step 2
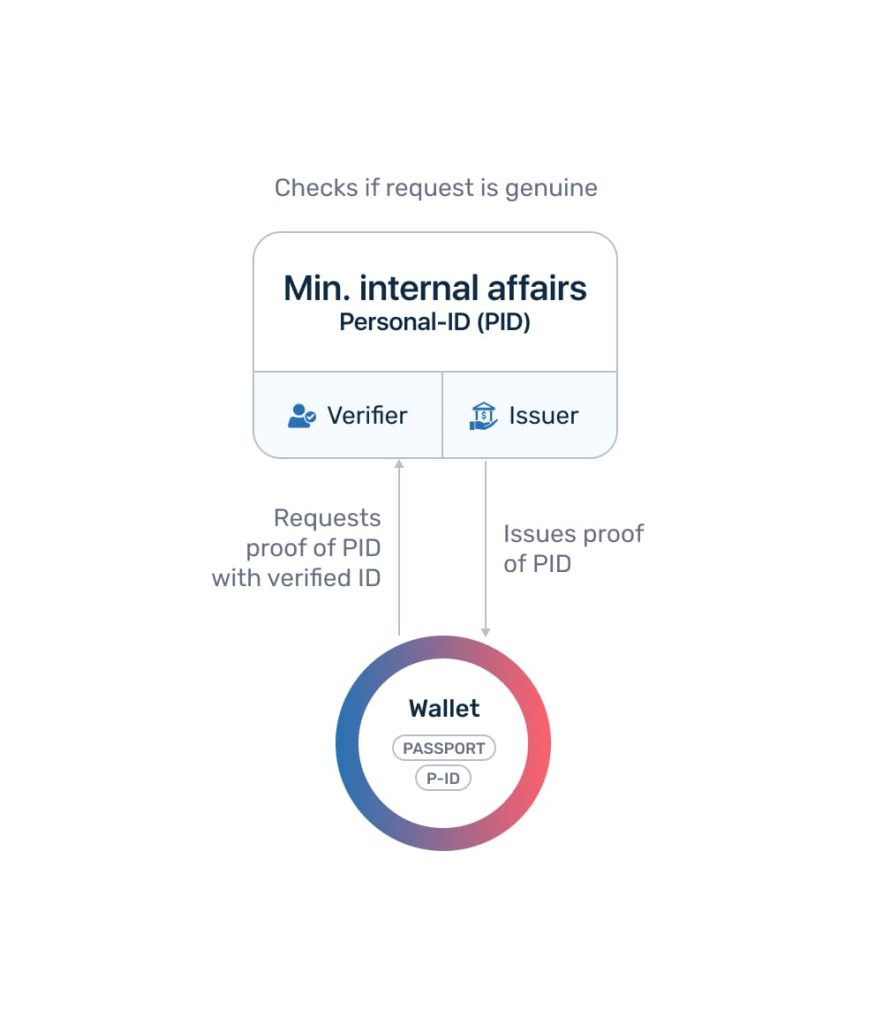
Collect Personal-ID
We created a digital Passport by onboarding with our physical passport. We now use this to collect our Personal ID from your government, basically matching your ID document with their database.
We store this P-ID in our wallet.
— Step 3
Collect Diploma
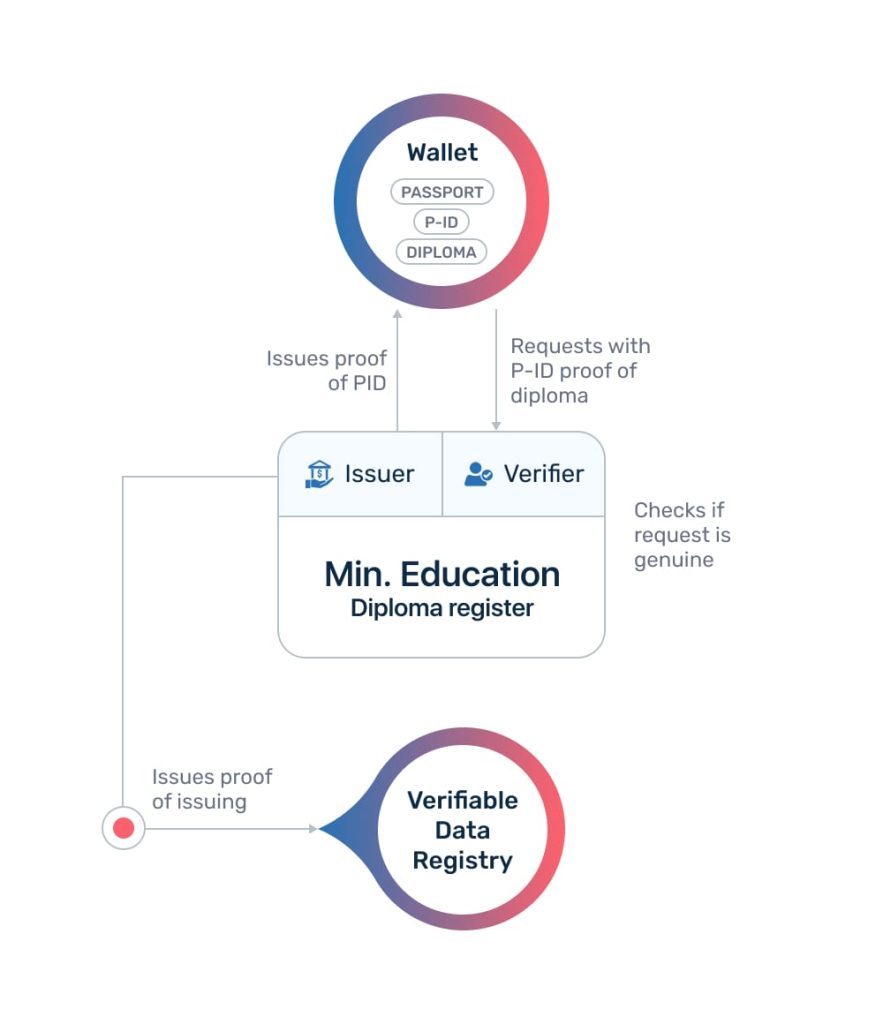
Use proof of PID to collect diploma
We continue our journey to collect a proof of our high school diploma by identifying ourselves at an Authoritative Source, the ministry of education.
Upon requests, it creates a proof of the attribute, your diploma, that matches your P-ID.
It also stores an anonymized issuing certificate in an open ledger, so it can be checked that your proof is valid and not revoked.
— Step 4
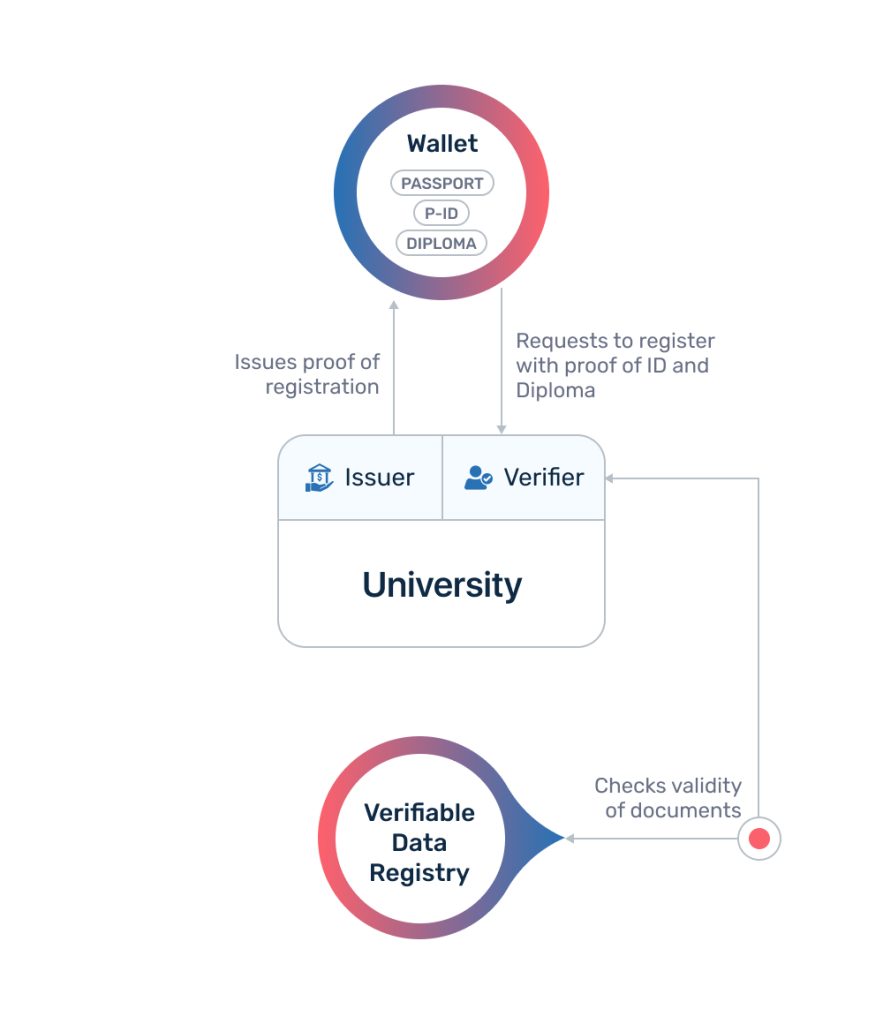
Register at University
Use P-ID and a Diploma to register
Finally! We can register!
We send our information to the verifier. The verifier does a provenance check to see if the documents are still valid, by using the anonymized tokens in the public registry.
This time it approves our registration and sends back the proof that we are registered.